
How to Use Kitchen Science to Teach Chemistry Basics to Kids
The world around us is governed by chemistry, yet for many children, it remains an intimidating, abstract subject confined to textbooks and laboratories. However, chemistry isn't just about bubbling beakers and complex equations; it’s about understanding how and why things work. And remarkably, much of that understanding can be unlocked right in your own kitchen. This article delves into the world of kitchen science, providing parents and educators with practical, engaging methods to introduce fundamental chemistry concepts to children, fostering a love for STEM that extends far beyond the countertop. By utilizing everyday ingredients and simple experiments, we can move beyond rote memorization and towards real scientific inquiry.
Too often, children disengage from science because it feels disconnected from their daily lives. Kitchen chemistry bridges this gap, demonstrating that science isn't a separate entity, but an integral part of cooking, baking, and even cleaning. It allows for hands-on learning, encouraging curiosity, observation, and problem-solving skills – all vital for developing critical thinking. Furthermore, introducing these concepts early builds a strong foundational understanding, making future science classes less daunting and more accessible. “The goal isn't to turn every child into a chemist," says Dr. Emily Carter, a STEM education specialist, “but to instill in them a scientific mindset – a way of looking at the world with curiosity and a desire to understand it.”
This approach also sidesteps the financial and logistical hurdles often associated with traditional science experiments. Elaborate equipment and specialized materials aren't required; the kitchen already holds a wealth of potential reactants and tools. This accessibility makes it a powerful tool for equitable STEM education, offering opportunities for all children to engage with science, regardless of socioeconomic background. Let's explore how to harness the power of the kitchen to spark a lifelong passion for chemistry in your children.
- Unveiling Acids & Bases: Lemon Juice vs. Baking Soda Volcanoes
- Exploring Mixtures and Solutions: The Sugar Dissolution Challenge
- The Magic of Emulsification: Making Homemade Mayonnaise
- Oxidation & Reduction: Apple Browning and Preventing It
- Investigating Chemical Changes: Baking – More Than Just a Sweet Treat!
- Extending the Learning: Gelatin and Polymers
- Conclusion: Cultivating Curiosity Through Kitchen Chemistry
Unveiling Acids & Bases: Lemon Juice vs. Baking Soda Volcanoes
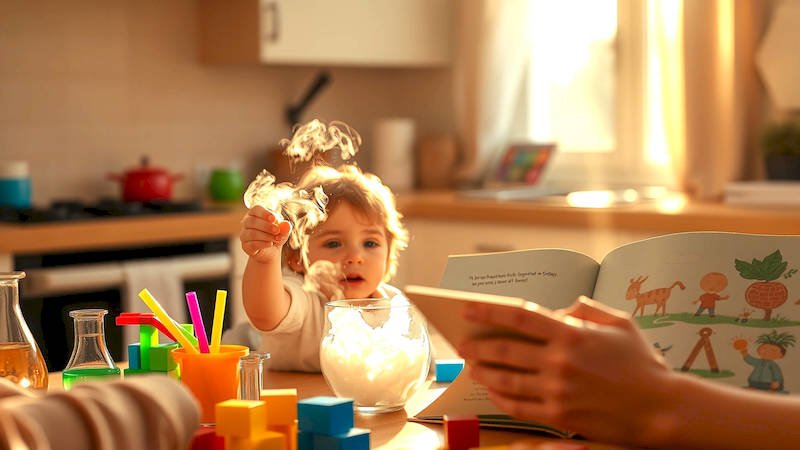
The concepts of acids and bases are foundational in chemistry, and thankfully, incredibly easy to demonstrate with common kitchen ingredients. Acids are substances that donate hydrogen ions (H+), while bases accept them. You don’t need to explain the precise definitions to young children; instead, focus on their observable properties: acids often taste sour (though tasting chemicals should always be avoided in experiments!), and bases often feel slippery. The classic baking soda and vinegar volcano vividly illustrates this interaction. Baking soda (sodium bicarbonate) is a base, and vinegar (acetic acid) is an acid.
When these two are combined, a chemical reaction occurs, producing carbon dioxide gas. This gas builds up pressure, creating the iconic “eruption.” To enhance the learning, discuss what’s happening: “See how the bubbles are forming? That's a new gas being created when the vinegar and baking soda mix! It's a chemical reaction.” Extend this by testing different household liquids with baking soda – lemon juice, orange juice (both acids), and soapy water (a base). Observe which produce vigorous fizzing (acids) and which don’t. This comparison helps children understand that not all liquids behave the same way and provides an early introduction to the concept of reactivity. A simple red cabbage indicator can be also used to visually show acids and bases - boiling red cabbage and using the water will change color in the presence of acids and bases.
This experiment isn't just about the spectacle; it's about observation, prediction, and understanding cause and effect. Encourage children to hypothesize which liquids will react more strongly and to explain why they think that is. This fosters critical thinking skills and reinforces the idea that science is about asking questions and seeking answers through experimentation.
Exploring Mixtures and Solutions: The Sugar Dissolution Challenge
Understanding the difference between mixtures and solutions is crucial for grasping various chemical processes. A mixture is a combination of substances that are physically combined but not chemically bonded – think of salad. A solution, however, is a homogenous mixture where one substance (the solute) dissolves into another (the solvent), forming a uniform composition – like sugar dissolved in water. This concept can be beautifully illustrated with a simple dissolution experiment.
Challenge your child to dissolve different amounts of sugar in the same amount of warm water. Start with a teaspoon, stir, and observe. Repeat with two teaspoons, then three, and so on. Guide them to notice that there’s a limit to how much sugar can dissolve. This introduces the idea of solubility – the maximum amount of a solute that can dissolve in a given amount of solvent at a specific temperature. Discuss why the sugar eventually stops dissolving. "The water can only hold so much sugar,” you can explain, “Once it’s full, any extra sugar just sits at the bottom.” Extend the experiment using salt, baking soda, or even different temperatures of water to observe how these factors affect solubility.
To further solidify understanding, compare this process to trying to mix oil and water. Oil and water don't form a solution; they remain separate layers. Discuss why this is different and relate it to the concept of polarity – although this concept can be introduced in a simplified form. This practical exploration helps demystify abstract chemical concepts and makes them relatable to everyday experiences.
The Magic of Emulsification: Making Homemade Mayonnaise
Emulsions are mixtures where two liquids that typically don’t mix (like oil and water) are forced to combine, creating a stable dispersion. Mayonnaise is a classic example of an emulsion, and making it from scratch provides a fantastic learning opportunity. Traditionally, making mayonnaise involves vigorously whisking egg yolks with vinegar or lemon juice, then slowly drizzling in oil while continuously mixing.
The egg yolk contains an emulsifier, a substance that stabilizes the emulsion by allowing oil and water to mix. Lecithin, found in egg yolks, has both hydrophilic (water-loving) and hydrophobic (oil-loving) parts, enabling it to bridge the gap between the two liquids. As you whisk, the lecithin molecules surround the oil droplets, preventing them from coalescing and separating from the water-based ingredients. Discussing the role of the emulsifier helps children understand how certain substances can alter the properties of mixtures. Encourage them to observe the change in texture as the emulsion forms – from a separated liquid to a thick, creamy sauce.
This experiment isn't just about making a tasty condiment; it’s about understanding a complex chemical principle in action. You can also explore how different factors, such as the rate of oil addition or the temperature of the ingredients, can affect the stability of the emulsion, encouraging further experimentation and problem-solving.
Oxidation & Reduction: Apple Browning and Preventing It
Oxidation is a chemical reaction involving the loss of electrons, while reduction involves the gain of electrons. It's a fundamental process that plays a role in everything from rusting to respiration, and it can be easily observed with a sliced apple. When an apple is cut, enzymes within the fruit react with oxygen in the air, causing a brownish discoloration – this is oxidation.
Explain to your child that the apple is “reacting with the air,” and that’s what’s causing it to change color. Challenge them to find ways to prevent this oxidation. Experiment with different methods: squeezing lemon juice (an acid, which inhibits the enzyme activity), wrapping the apple slices in plastic wrap (reducing oxygen exposure), or dipping them in water mixed with a little vitamin C (an antioxidant that scavenges free radicals involved in oxidation). Observe which methods are most effective and discuss why.
This provides a practical understanding of how we can control chemical reactions and preserve food. Explain that this same principle is used in many food preservation techniques. This simple activity illustrates a key scientific process and demonstrates the power of experimentation and observation.
Investigating Chemical Changes: Baking – More Than Just a Sweet Treat!
Baking is a wonderful laboratory for observing chemical changes. From the leavening action of baking powder to the Maillard reaction responsible for browning and flavor development, countless chemical processes occur during the baking process. Discuss how ingredients transform when heated. For instance, the baking powder releases carbon dioxide gas, creating bubbles that make cakes and cookies rise.
Refer back to the volcano experiment - the carbon dioxide is essentially the same gas! Explain that eggs change texture when heated as proteins denature and coagulate, and that sugar caramelizes through a series of complex chemical reactions. Encourage your child to be a "baking scientist" - observing changes in texture, color, and aroma throughout the baking process. "What happens if we use different amounts of baking powder?” or "What happens if we substitute one ingredient for another?” are great questions to prompt experimentation and deeper understanding.
Baking provides a tangible, delicious example of how chemistry is integral to everyday life.
Extending the Learning: Gelatin and Polymers
Gelatin is a fantastic way to introduce the idea of polymers. Polymers are large molecules made up of repeating subunits - think of them like long chains. Gelatin is a protein-based polymer derived from collagen. When you dissolve gelatin in hot water, the heat breaks the bonds holding the protein chains together. As it cools, these bonds reform, creating a semi-solid gel.
Discuss with your child how something liquid can become solid. The experiment illustrates how altering the properties - in this case, temperature - can change the physical characteristics of a substance. This can be extended by talking about other polymers around us, like plastics and rubber. Point out how these materials also have unique properties due to their polymer structure.
Conclusion: Cultivating Curiosity Through Kitchen Chemistry
Kitchen chemistry is an incredibly powerful tool for fostering a love of STEM in children. By transforming the familiar kitchen into a laboratory, we can make complex scientific concepts accessible, engaging, and fun. The experiments outlined above – from investigating acids and bases to exploring emulsions and oxidation – provide hands-on learning opportunities that go beyond rote memorization. Remember, the goal isn’t to create miniature chemists overnight, but to instill a scientific mindset - a curiosity about the world and a desire to understand how it works.
The key takeaways are simple: embrace everyday experiments, encourage observation and questioning, and connect science to daily life. Don’t be afraid to let your child lead the exploration, even if it means making a mess (within reason, of course!). The mess is often a sign of learning in progress. Start with one experiment this week, and see where it leads. Resources like science websites geared toward children, library books, and online videos can further enhance the learning experience. By making science fun and accessible, you can help your child develop a lifelong passion for STEM and unlock their full potential.
Deja una respuesta